Documentation
CFD
Tutorials
UI
Blender VWT
In this tutorial we will go through a step-by-step guide of how to use Compute to run a virtual wind tunnel from Blender. We will download the results and finally visualize them with ParaView.
Setup
To follow along or to try it yourself, download our demo file of this tutorial. Furthermore, you need to have Blender, our Blender plugin and ParaView installed.
We have 6 steps to go through:
- Login
- Project and Task creation
- Meshing
- Virtual Wind Tunnel Setup
- Case Download
- Visualization in ParaView
Login
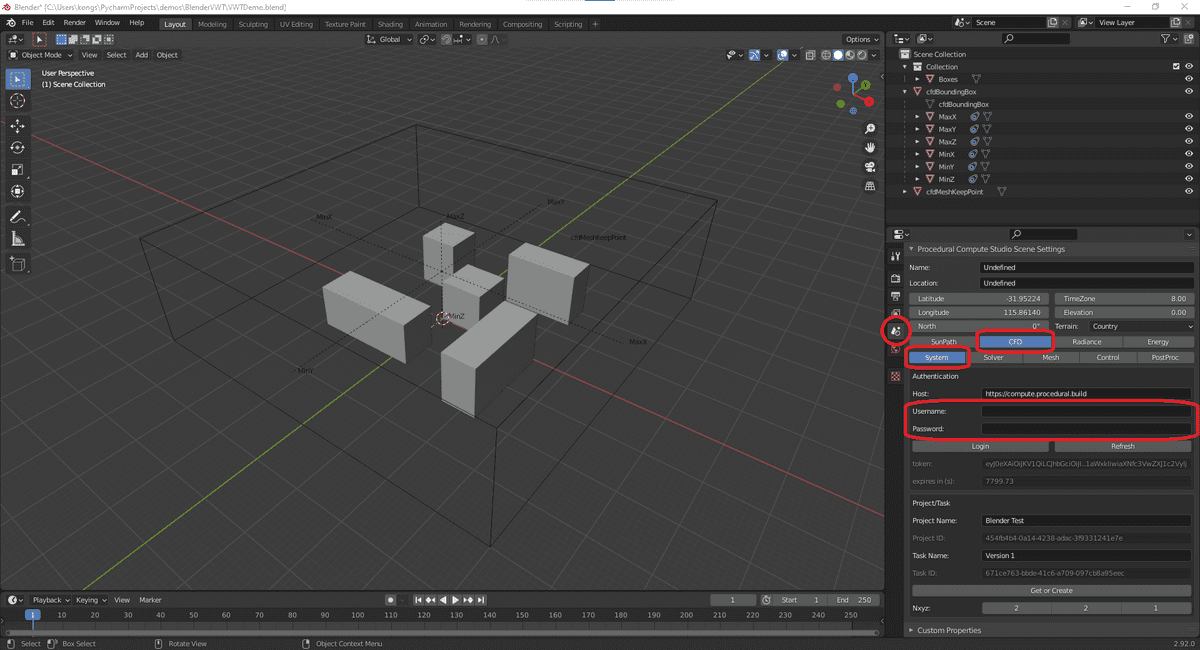
The first thing to do is to log in with your username and password. If you don't have a user for Compute yet, then you need to sign up first. You can go to our registration page to do so. Fill in your username and password in the panel to the left as shown below.
And click Login
Project and Task Creation
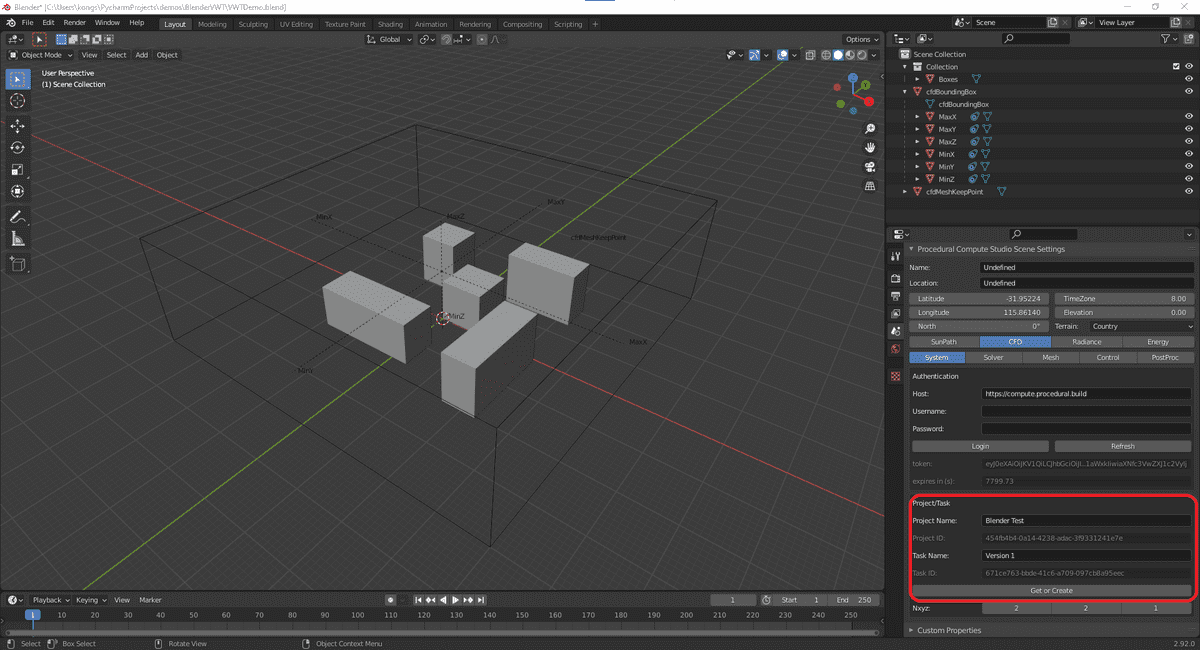
Every task on Compute belongs to a project. Then first thing to do is to create that project. You can do it manually through the web browser or you can do it in Blender's menu. Here we are going to stick to Blender.
We will call our project Blender VWT and our Task Name Version 1. The parent task we create together with our
project works to group our simulation tasks, so we can easily keep track of design iterations. When we click on
the Get or Create button the project and task will be created on Compute (or it will be retrieved if it already
exists).
Meshing
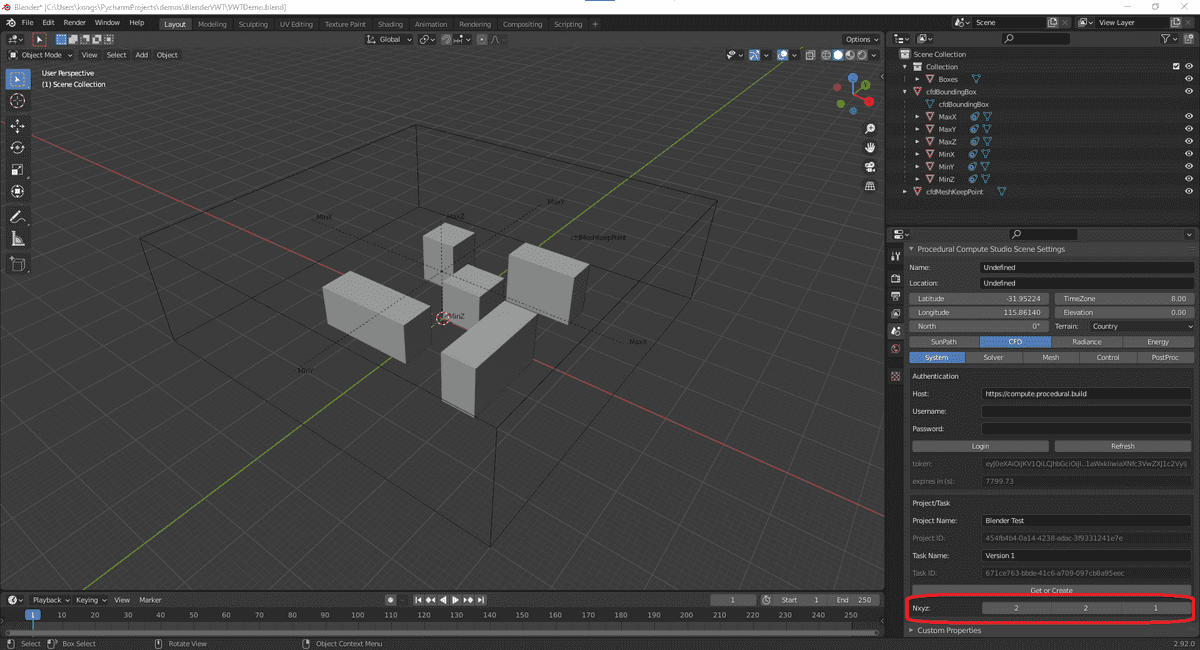
Before leaving the System tab, we will specify the number of CPUs to use for this case. We specify it here with
OpenFOAM syntax, meaning that we write how many CPUs there should be used in each direction (X, Y, Z). The total number
of CPUs is the product of the 3 values. E.g. 2 x 2 x 1 = 4 CPUs
Before getting started with the meshing it is important to clean and check the geometry. We have a article explaining some common steps in that process. You can find it here
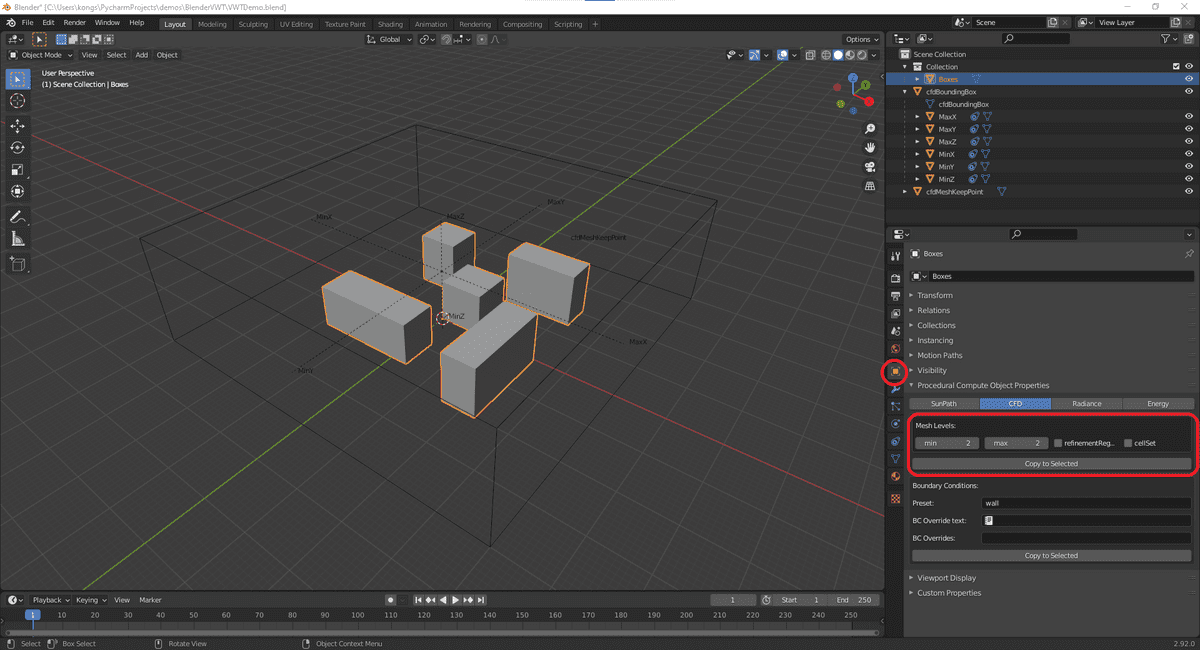
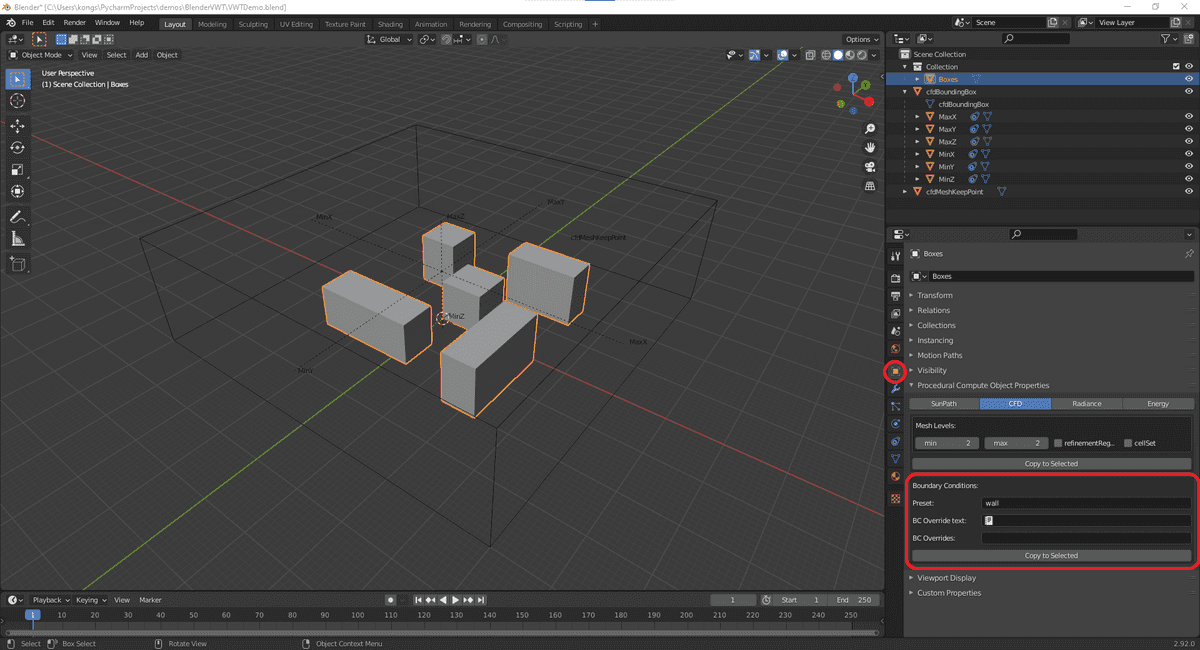
When you have a clean geometry then you can start applying the mesh resolution to the model. The mesh levels defines how
many times the cells should be divided compared to the BlockMeshSize.
The boundary conditions are set in the panel below. Be default everything is given the wall preset. That can be
changed or there can be applied overrides. For the buildings the wall preset is a good choice.
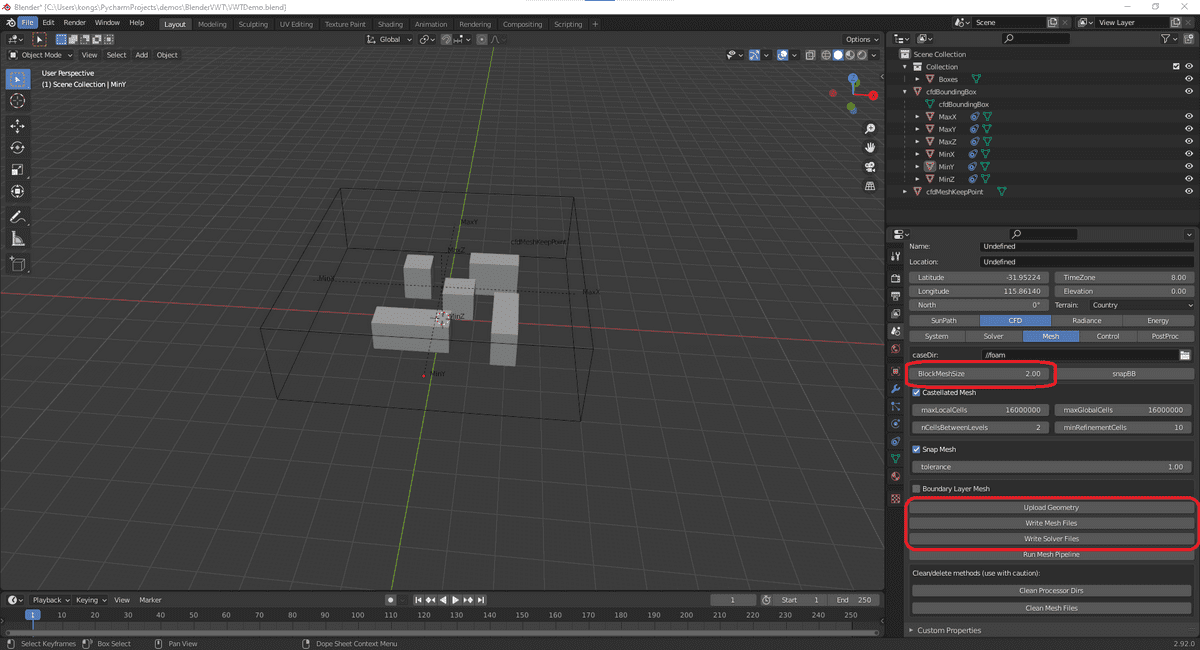
If you go to the CFD -> Mesh panel you are able to specify the BlockMeshSize.
Now we are ready to start the Meshing process. Click on:
Upload GeometryWrite Mesh FilesWrite Solver Files
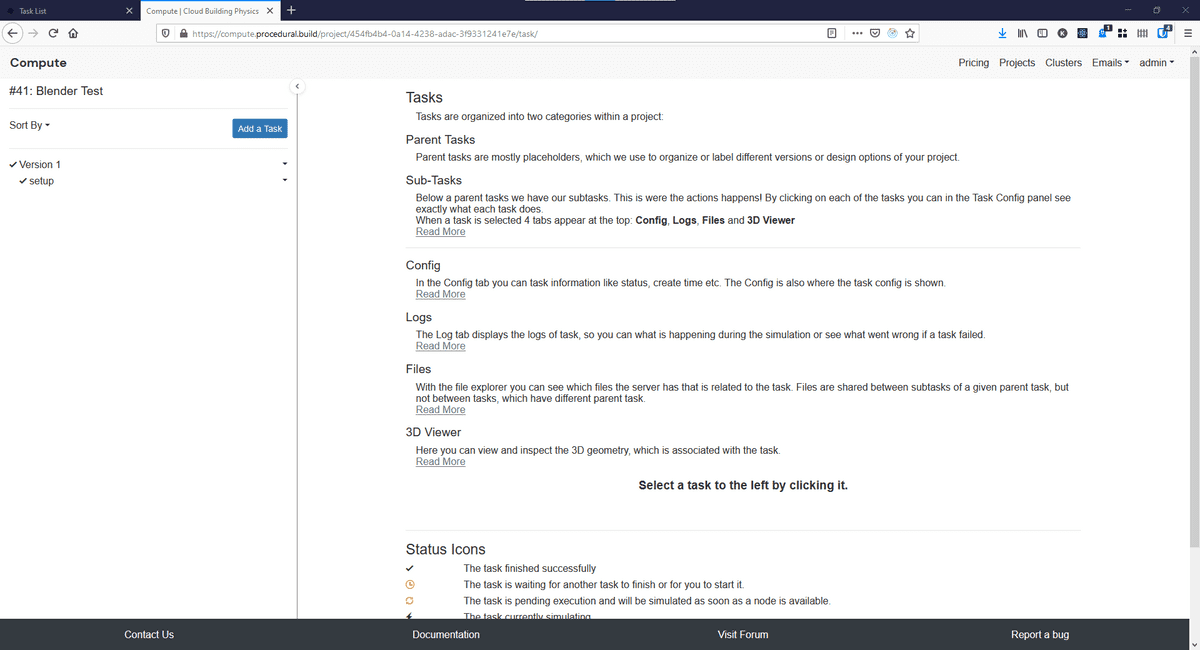
This will create a subtask in your project.
Verify that the task is running and when it is done and having next to it, you can go back to Blender.
Virtual Wind Tunnel Setup
The next step will create both the Mesh task and the Virtual Wind Tunnel tasks.
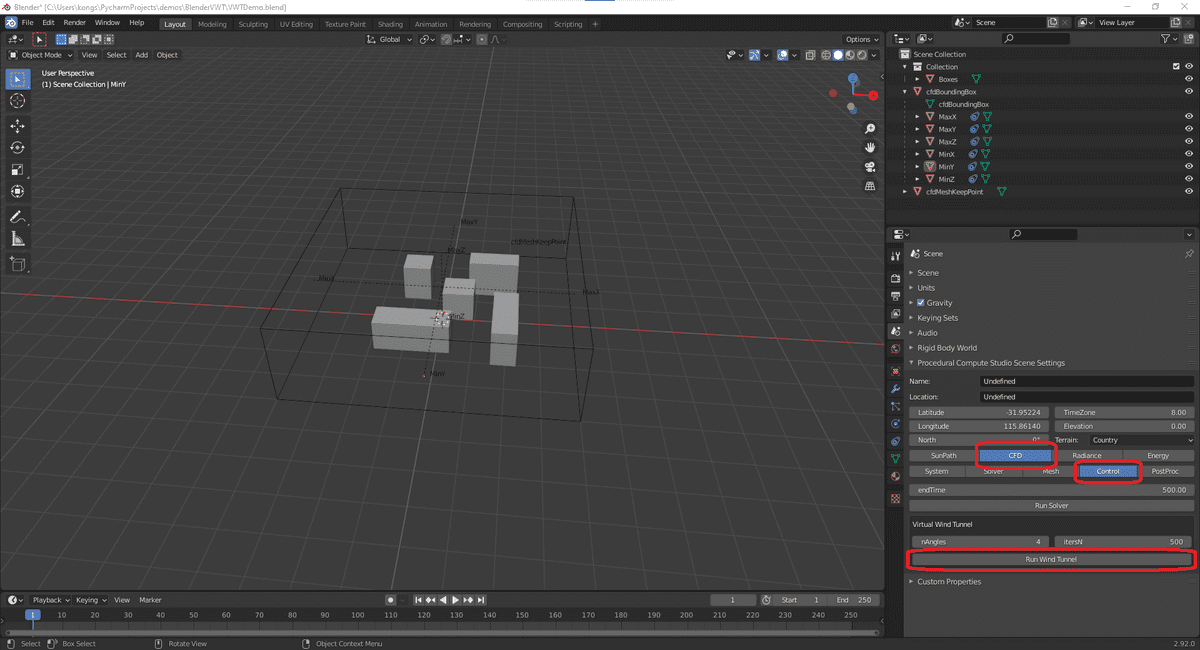
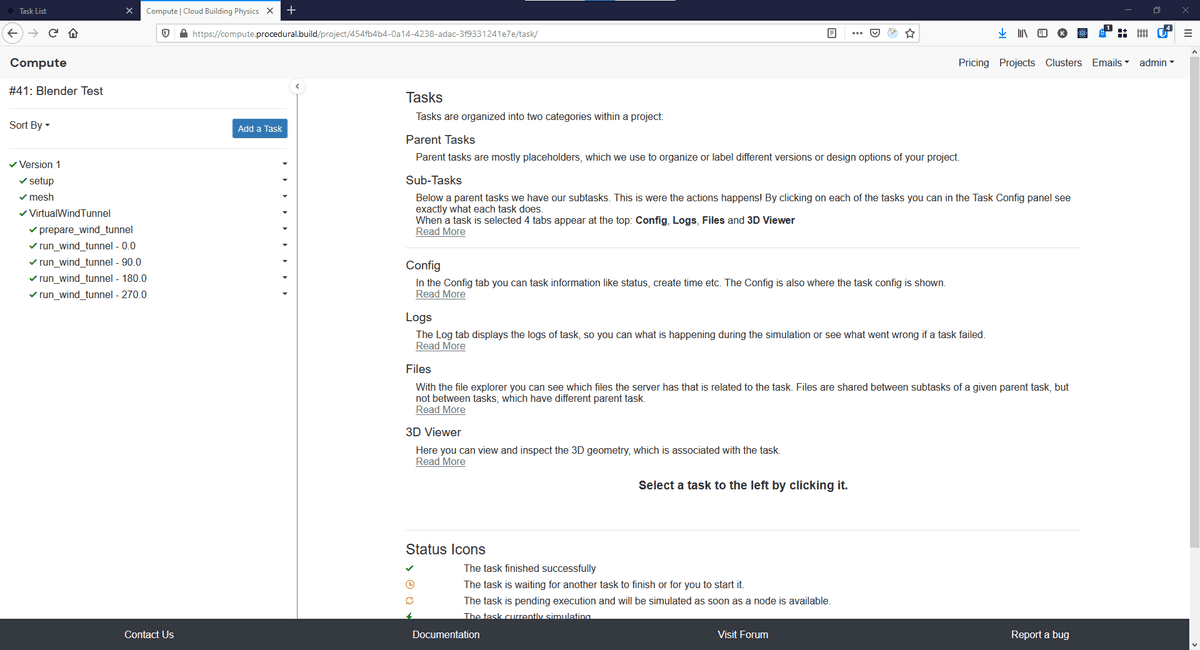
In the Control tab you can specify the number of angles you want to run (nAngles).
Here we will just run 4 angles.
Click Run Wind Tunnel to create the Mesh and Virtual Wind Tunnel Tasks.
The Mesh and Virtual Wind Tunnel tasks will now run.
Case Download
When the tasks are all successfully done. You can start thinking about visualizing them. In this walk-through we will use ParaView locally to do so. If you have a huge case then you can also run ParaView in the cloud with our ParaView Web implementation. See how here
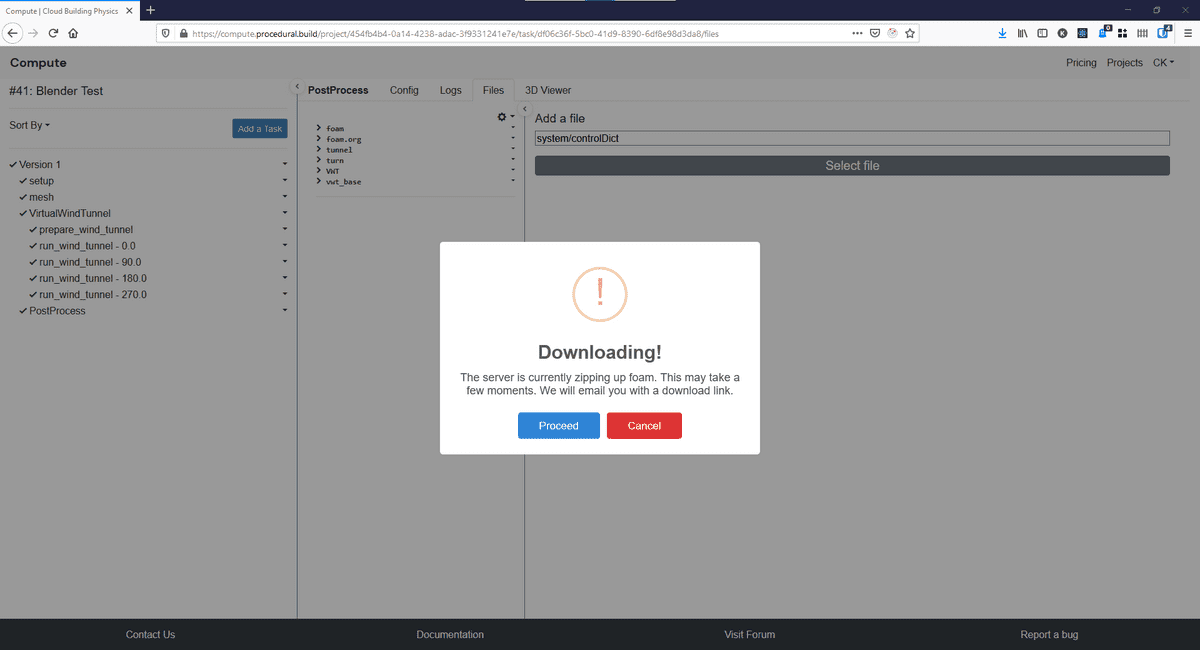
Go to the files section of the browser and click the () in the top to download the whole case. You will shortly receive an email with a download link. Download the .zip file from that link and extract it.
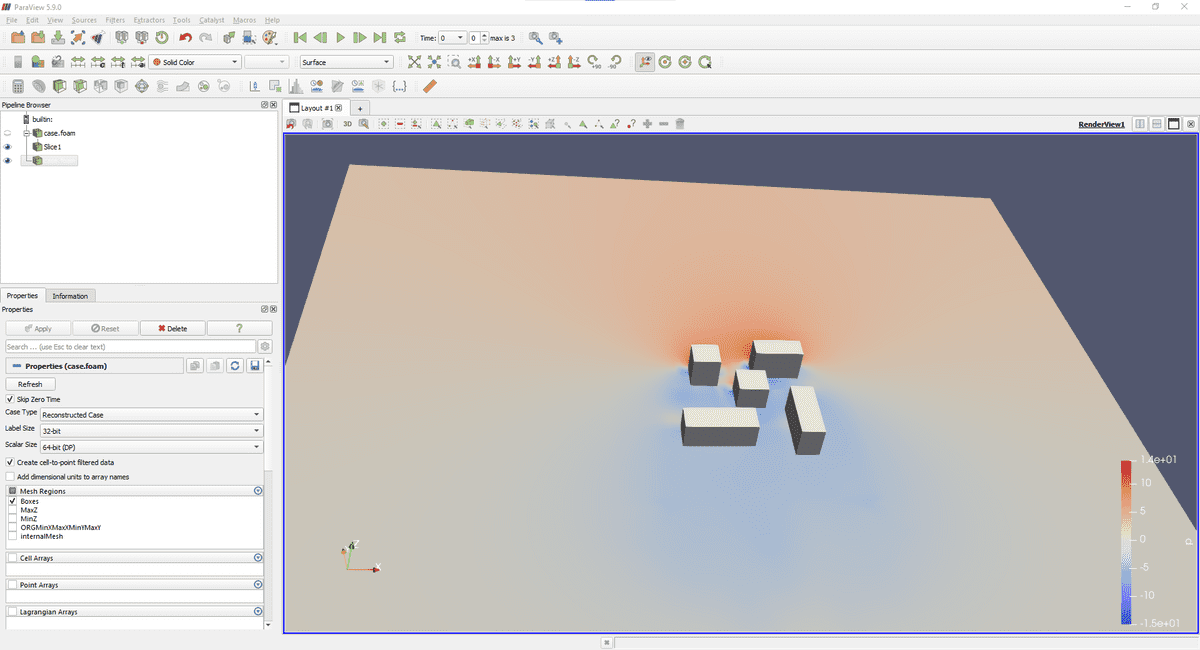
Visualization in ParaView
You can now use ParaView to load and visualize the case!
