Documentation
CFD
Tutorials
UI
Runtime Probes
Function Objects
Sometimes you are interested in knowing how a set of points develops throughout the iterations of your simulation. It could e.g. be that you are interested in seeing how the boundary profile builds up over time and if it reaches a satisfactory level within the number of iterations that you specified.
This is possible to do with OpenFOAM's function objects. Function objects are user specified functions that run at a
specified iteration interval. The function objects are located in the system/controlDict file.
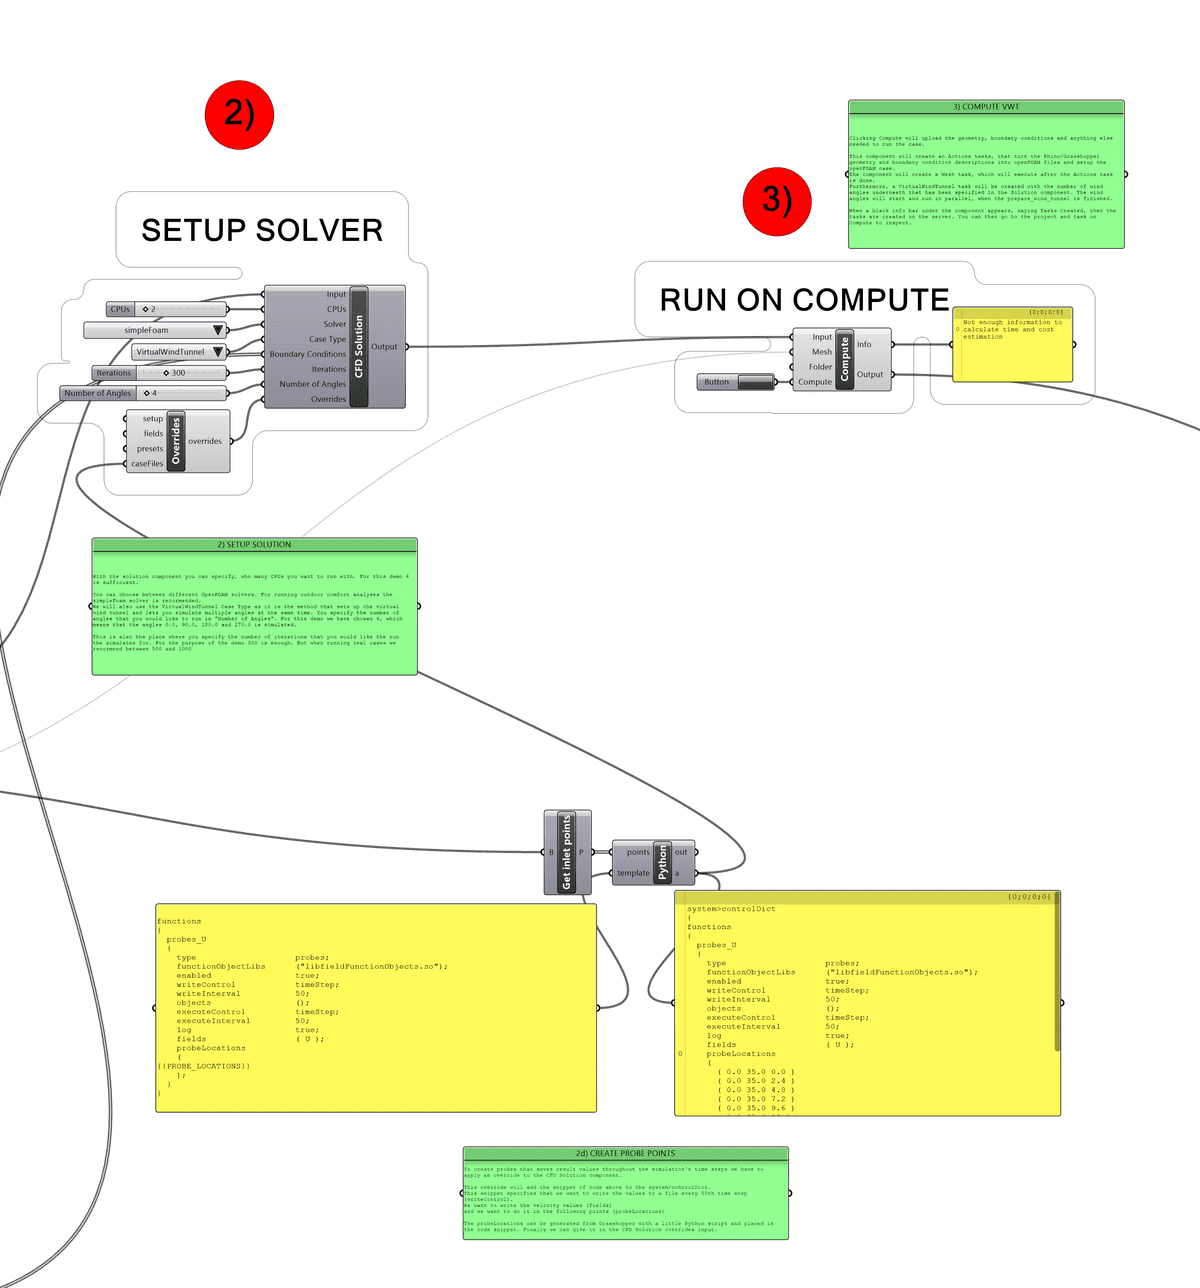
A function object can be applied in Compute, with a simple override.
Override
A template of the override to apply looks like this below
functions
{
  probes_U
  {
    type                probes;
    functionObjectLibs  ("libfieldFunctionObjects.so");
    enabled             true;
    writeControl        timeStep;
    writeInterval       50;
    executeControl      timeStep;
    executeInterval     50;
    log                 true;
    fields              ( U );
    probeLocations
    (
        ...
    )
  }
}
There are a few interesting parts of the template:
probes_Uspecifies the name of the function object. That name is not fixed, but can be user defined. In the template we have called itprobes_U, but makes sense to name it after the probe set you specify. That way it is easier to find, if you have multiple function objects.writeIntervalandexecuteIntervalis at what frequency the function object should run. In the template we have set it to every 50th iteration.fields, which fields to probe. Multiple fields can be applied here we have just chosen the velocity field:U.probeLocationsis a list of x, y and z coordinates that specifies the probe points, where we want to extract values.
Using a simple Python Script component in Grasshopper it is easy to insert probe points into the template. When the
template contains the probe points then it can be applied to the caseFiles override input in the CFD Solver component.
That will write the template into the system/controlDict file when the Action task runs on Compute.
Read more about the function objects in OpenFOAM's documentation
Demo
Try out our Grasshopper demo of this. You can download the script here or find it on the Tutorials page, where it is called Advanced Probing
